
Short answer: To optimize images for the web on a Mac, resize them to the largest size your layout renders, convert them to a modern format such as WebP, and compress them with a quality setting you have checked in a before-and-after preview. PixPack does all three in one pass.
What you need
- macOS 14.0 or later
- PixPack – Image Compressor Pro from the Mac App Store
Step by step
-
Decide the maximum display size
Work out the largest width your layout will ever render for these images, taking high-density displays into account if your design needs them.
-
Add the assets
Drag the asset folder into PixPack to build the batch.
-
Choose the output format
WebP usually gives the smallest files for modern browsers. JPEG remains the most compatible fallback. Keep PNG or WebP if the assets need transparency.
-
Set the maximum width and height
Enter the display size you decided on and keep the aspect ratio locked.
-
Tune the quality
Start from the Web preset, then adjust the slider while watching the preview and the reported savings.
-
Save a preset and export
Save the configuration as a custom preset so future asset drops match, then export the batch.
Choosing a format
- WebP — best size for modern browsers, supports transparency
- JPEG — maximum compatibility for photographs
- PNG — lossless and transparent, but usually larger
- HEIC — not suitable for web delivery because browser support is limited
Why resize matters most
Serving a 2560 px image in an 800 px slot wastes bandwidth and slows the page. Reducing pixel dimensions is usually the single largest saving available, and it improves rendering performance as well.
Consistency across a project
Saving your format, dimensions and quality as a custom preset keeps every asset in a project consistent, which makes both page weight and visual quality predictable.
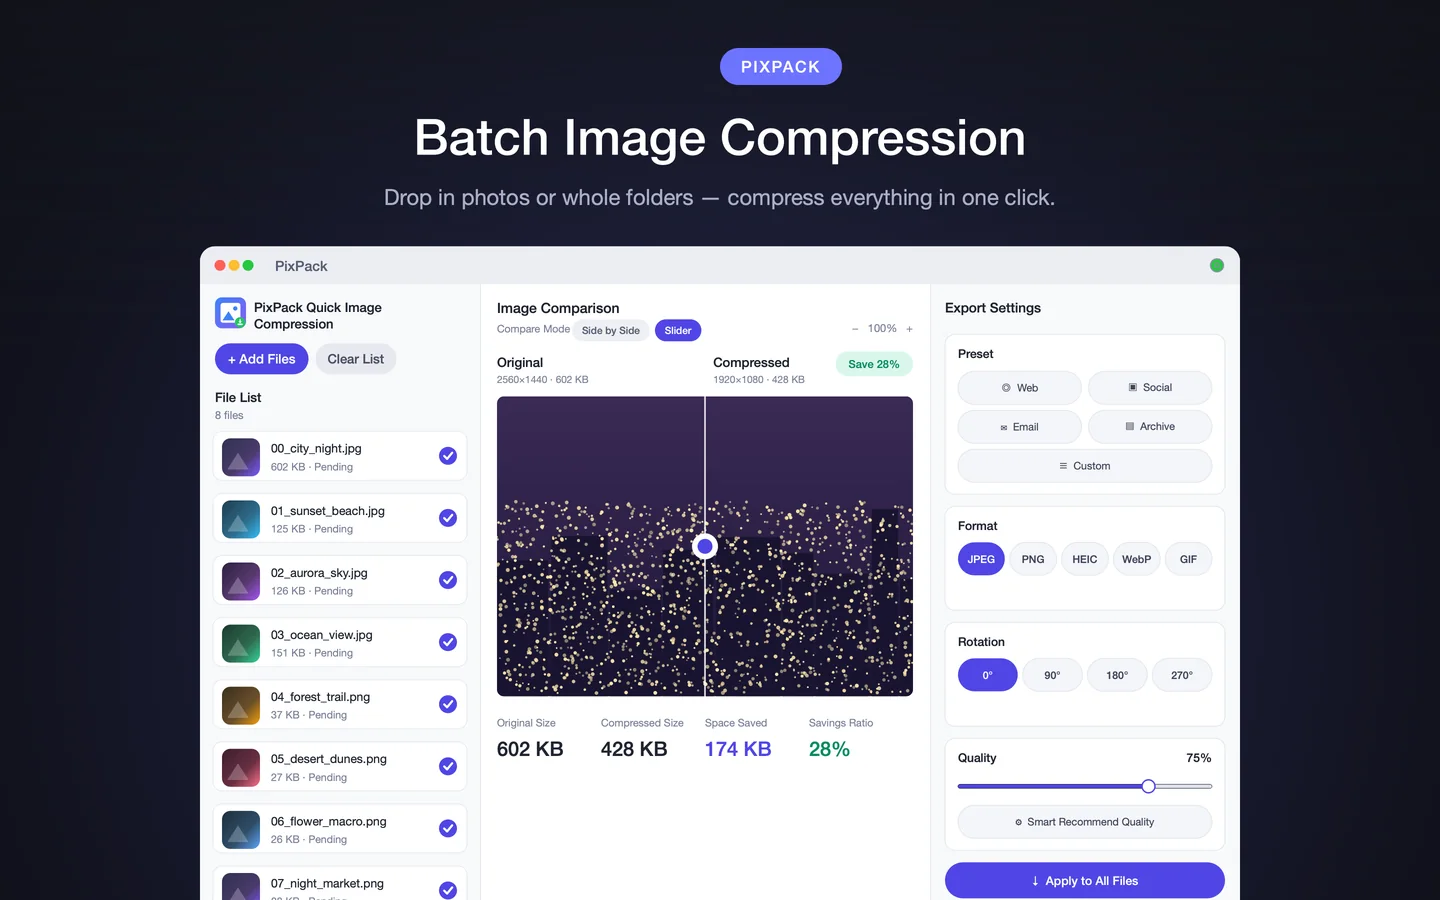
Expected result
A folder of web-ready images at consistent dimensions and quality, converted to your chosen format, with the size reduction reported per file.
Tips
- Resize to the largest rendered size rather than the original resolution.
- Preview a photographic image and a text-heavy screenshot separately — they respond differently to quality settings.
- Keep the originals outside the deployed asset folder.
Frequently asked questions
What is the best image format for the web?
WebP usually produces the smallest files for modern browsers. JPEG remains the most compatible fallback, and PNG or WebP are the options when transparency is needed.
What size should web images be?
Resize to the largest size your layout will actually render. Images displayed at 800 px wide do not need to be 2560 px wide.
Does PixPack generate responsive image variants?
No. PixPack prepares image files at the dimensions you specify. Generating multiple responsive variants and the markup that selects between them is a site-level task.
Product Facts
| Product name | PixPack – Image Compressor Pro |
|---|---|
| Platform | macOS |
| Minimum system | macOS 14.0 or later |
| Architecture | Apple Silicon + Intel |
| Current version | 1.4.3 |
| Price | $9.99 (US App Store) |
| Processing | Local on your Mac |
| Privacy label | Data Not Collected |
Source: Apple App Store · Last verified:
Sources
- PixPack on the Mac App Store Official App Store product page for PixPack – Image Compressor Pro, including the product description, feature list, supported formats, system requirements, version history and price.
- Apple iTunes Lookup API record for PixPack Structured App Store metadata record used to verify version number, minimum macOS version, price, file size, release dates, age rating and the number of listed localizations.
Last verified: