Short answer: To get started, install PixPack from the Mac App Store, drag your images or a folder into the window, choose a preset and output format, check the before-and-after preview, and export the batch to a folder you choose.
First compression, step by step
-
Install PixPack
Install PixPack – Image Compressor Pro from the Mac App Store. It requires macOS 14.0 or later and runs on Apple Silicon and Intel Macs.
-
Add images to the queue
Drag files or a whole folder into the PixPack window, use Add Files to select them, or press ⌘V to paste an image from the clipboard.
-
Review the queue
Use the per-file checkboxes to deselect anything you do not want to process. Drag files to reorder the queue if the export order matters.
-
Choose a preset
Start from the Web, Social, Email or Archive preset, then adjust the output format, quality and maximum width and height as needed.
-
Apply to the batch
Press Apply to All Files so every image uses the same settings.
-
Check the preview
Use slider or side-by-side comparison to inspect the compressed result. PixPack reports the original size, compressed size, space saved and savings ratio.
-
Export
Choose an output folder and export. PixPack writes the compressed copies there and leaves your originals untouched.
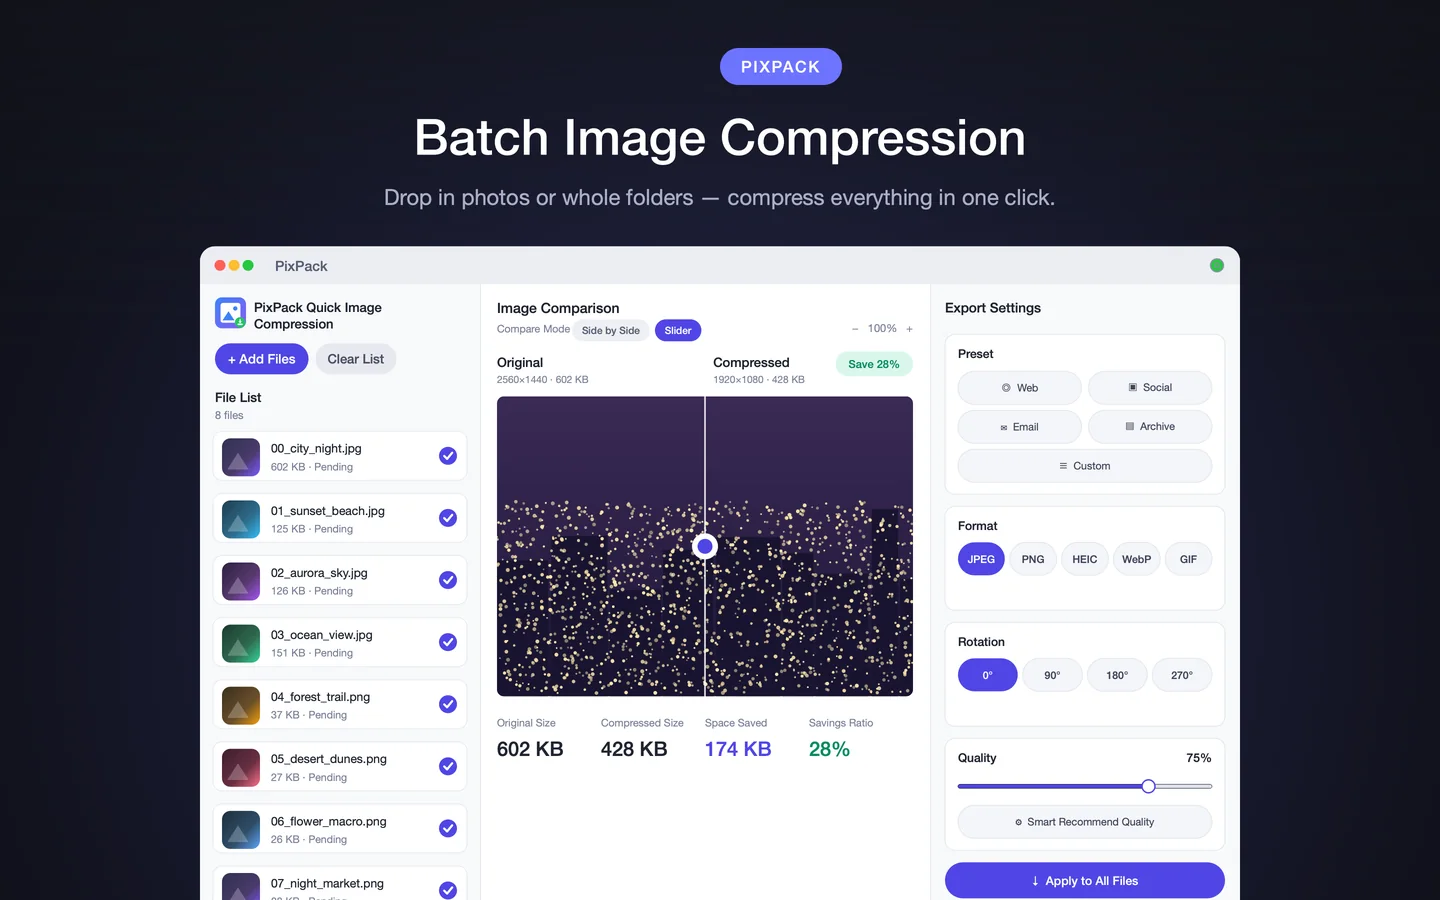
Understanding the three panels
- File list — the batch queue. Add files, multi-select, reorder, or clear the list.
- Image comparison — the before-and-after preview with slider and side-by-side modes, plus the per-file statistics.
- Export settings — preset, format, rotation, quality, maximum width and height, and metadata options.
Common first tasks
Getting started questions
What do I do first after installing PixPack?
Drag a folder of images onto the PixPack window to build a batch, or press ⌘V to paste a single image from the clipboard. Then choose a preset and export.
Will PixPack modify my original images?
No. PixPack exports compressed copies to the output folder you choose. Your originals are unchanged unless you deliberately export into the same folder.
What is the fastest way to start a batch?
Drag a folder onto the PixPack icon or window. The App Store tips describe this as the quickest way to start a batch immediately.
How do I know if the compression looks right?
Use the before-and-after preview. Slider comparison lets you drag a divider across the image to compare the original and the compressed result in place.
Sources
- PixPack on the Mac App Store Official App Store product page for PixPack – Image Compressor Pro, including the product description, feature list, supported formats, system requirements, version history and price.
- Apple iTunes Lookup API record for PixPack Structured App Store metadata record used to verify version number, minimum macOS version, price, file size, release dates, age rating and the number of listed localizations.
Last verified: